Text
Add lines of text, pick fonts and colors, and wrap longer text.
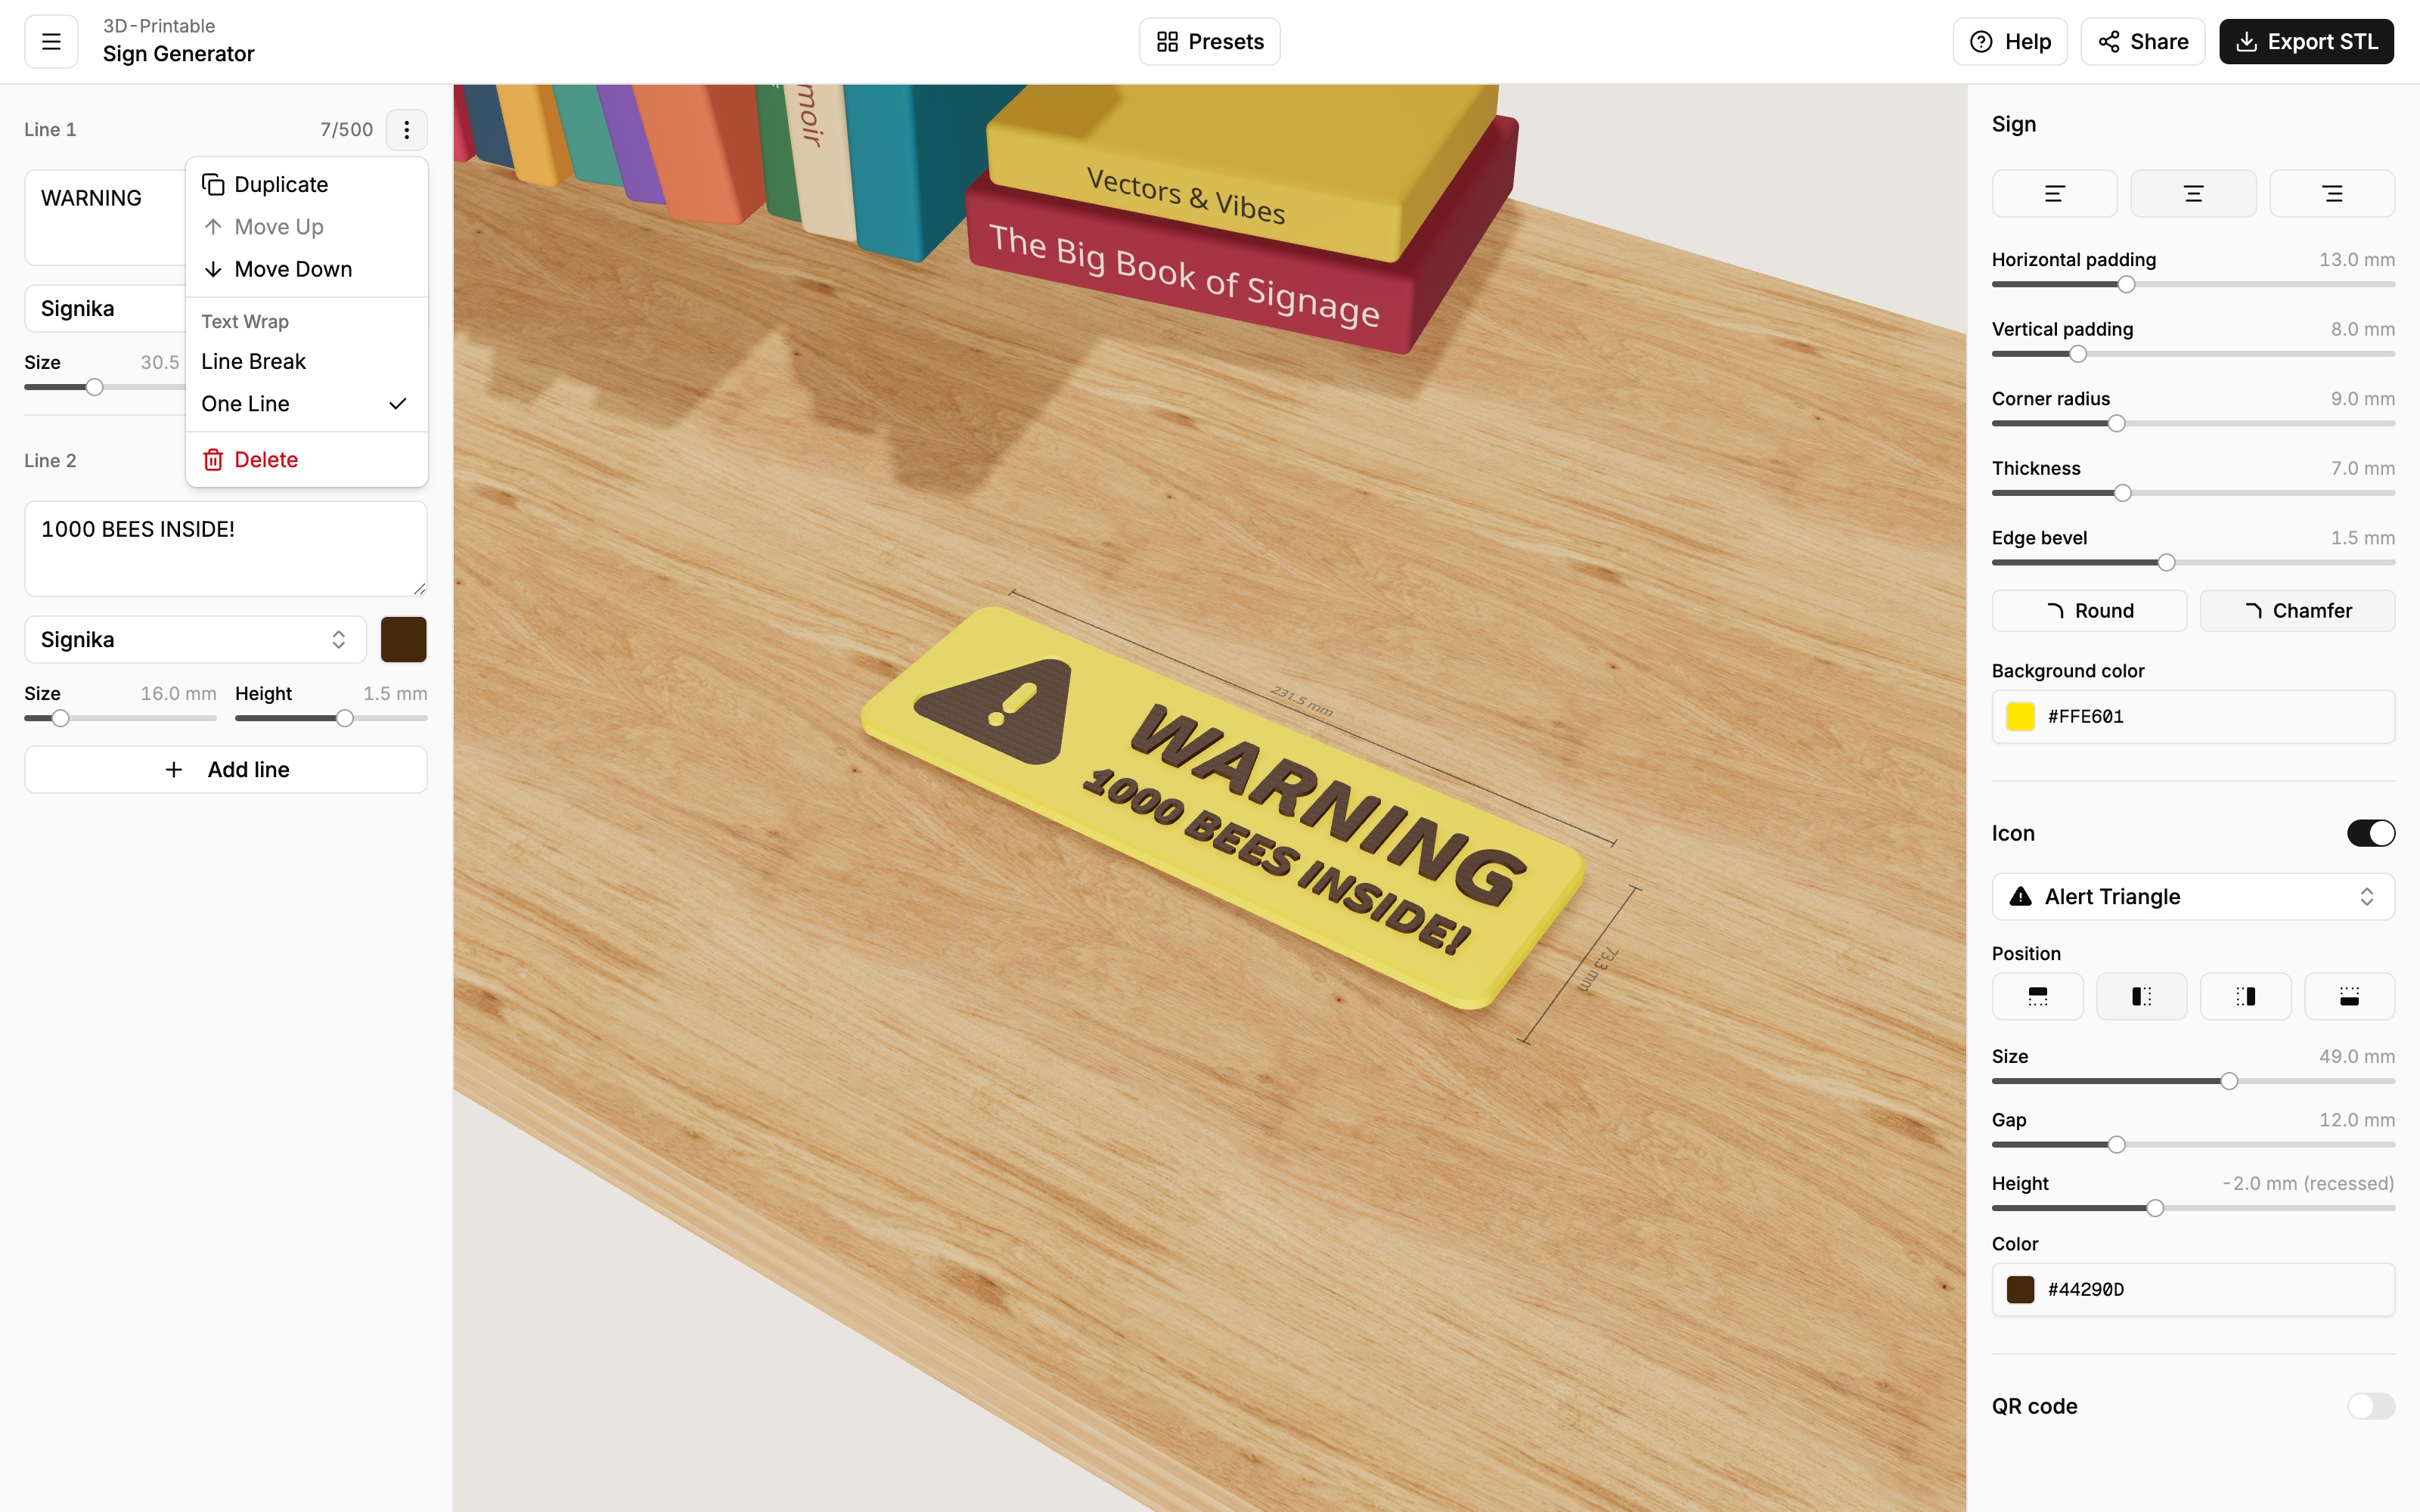
Text lives in the left panel of the editor. A sign is built from lines — each line is its own piece of text with its own font, size, color and height, so you can combine a big headline with smaller text underneath.
Lines
Type your text into a line's text box. Click Add line at the bottom of the panel to add another — a sign can have up to 10 lines, and each line can hold up to 500 characters.
The ⋮ menu at the top right of each line lets you:
- Duplicate the line (handy when you want several lines with the same styling),
- Move Up / Move Down to reorder lines on the sign,
- switch between One Line and Line Break text wrapping (see below),
- Delete the line.
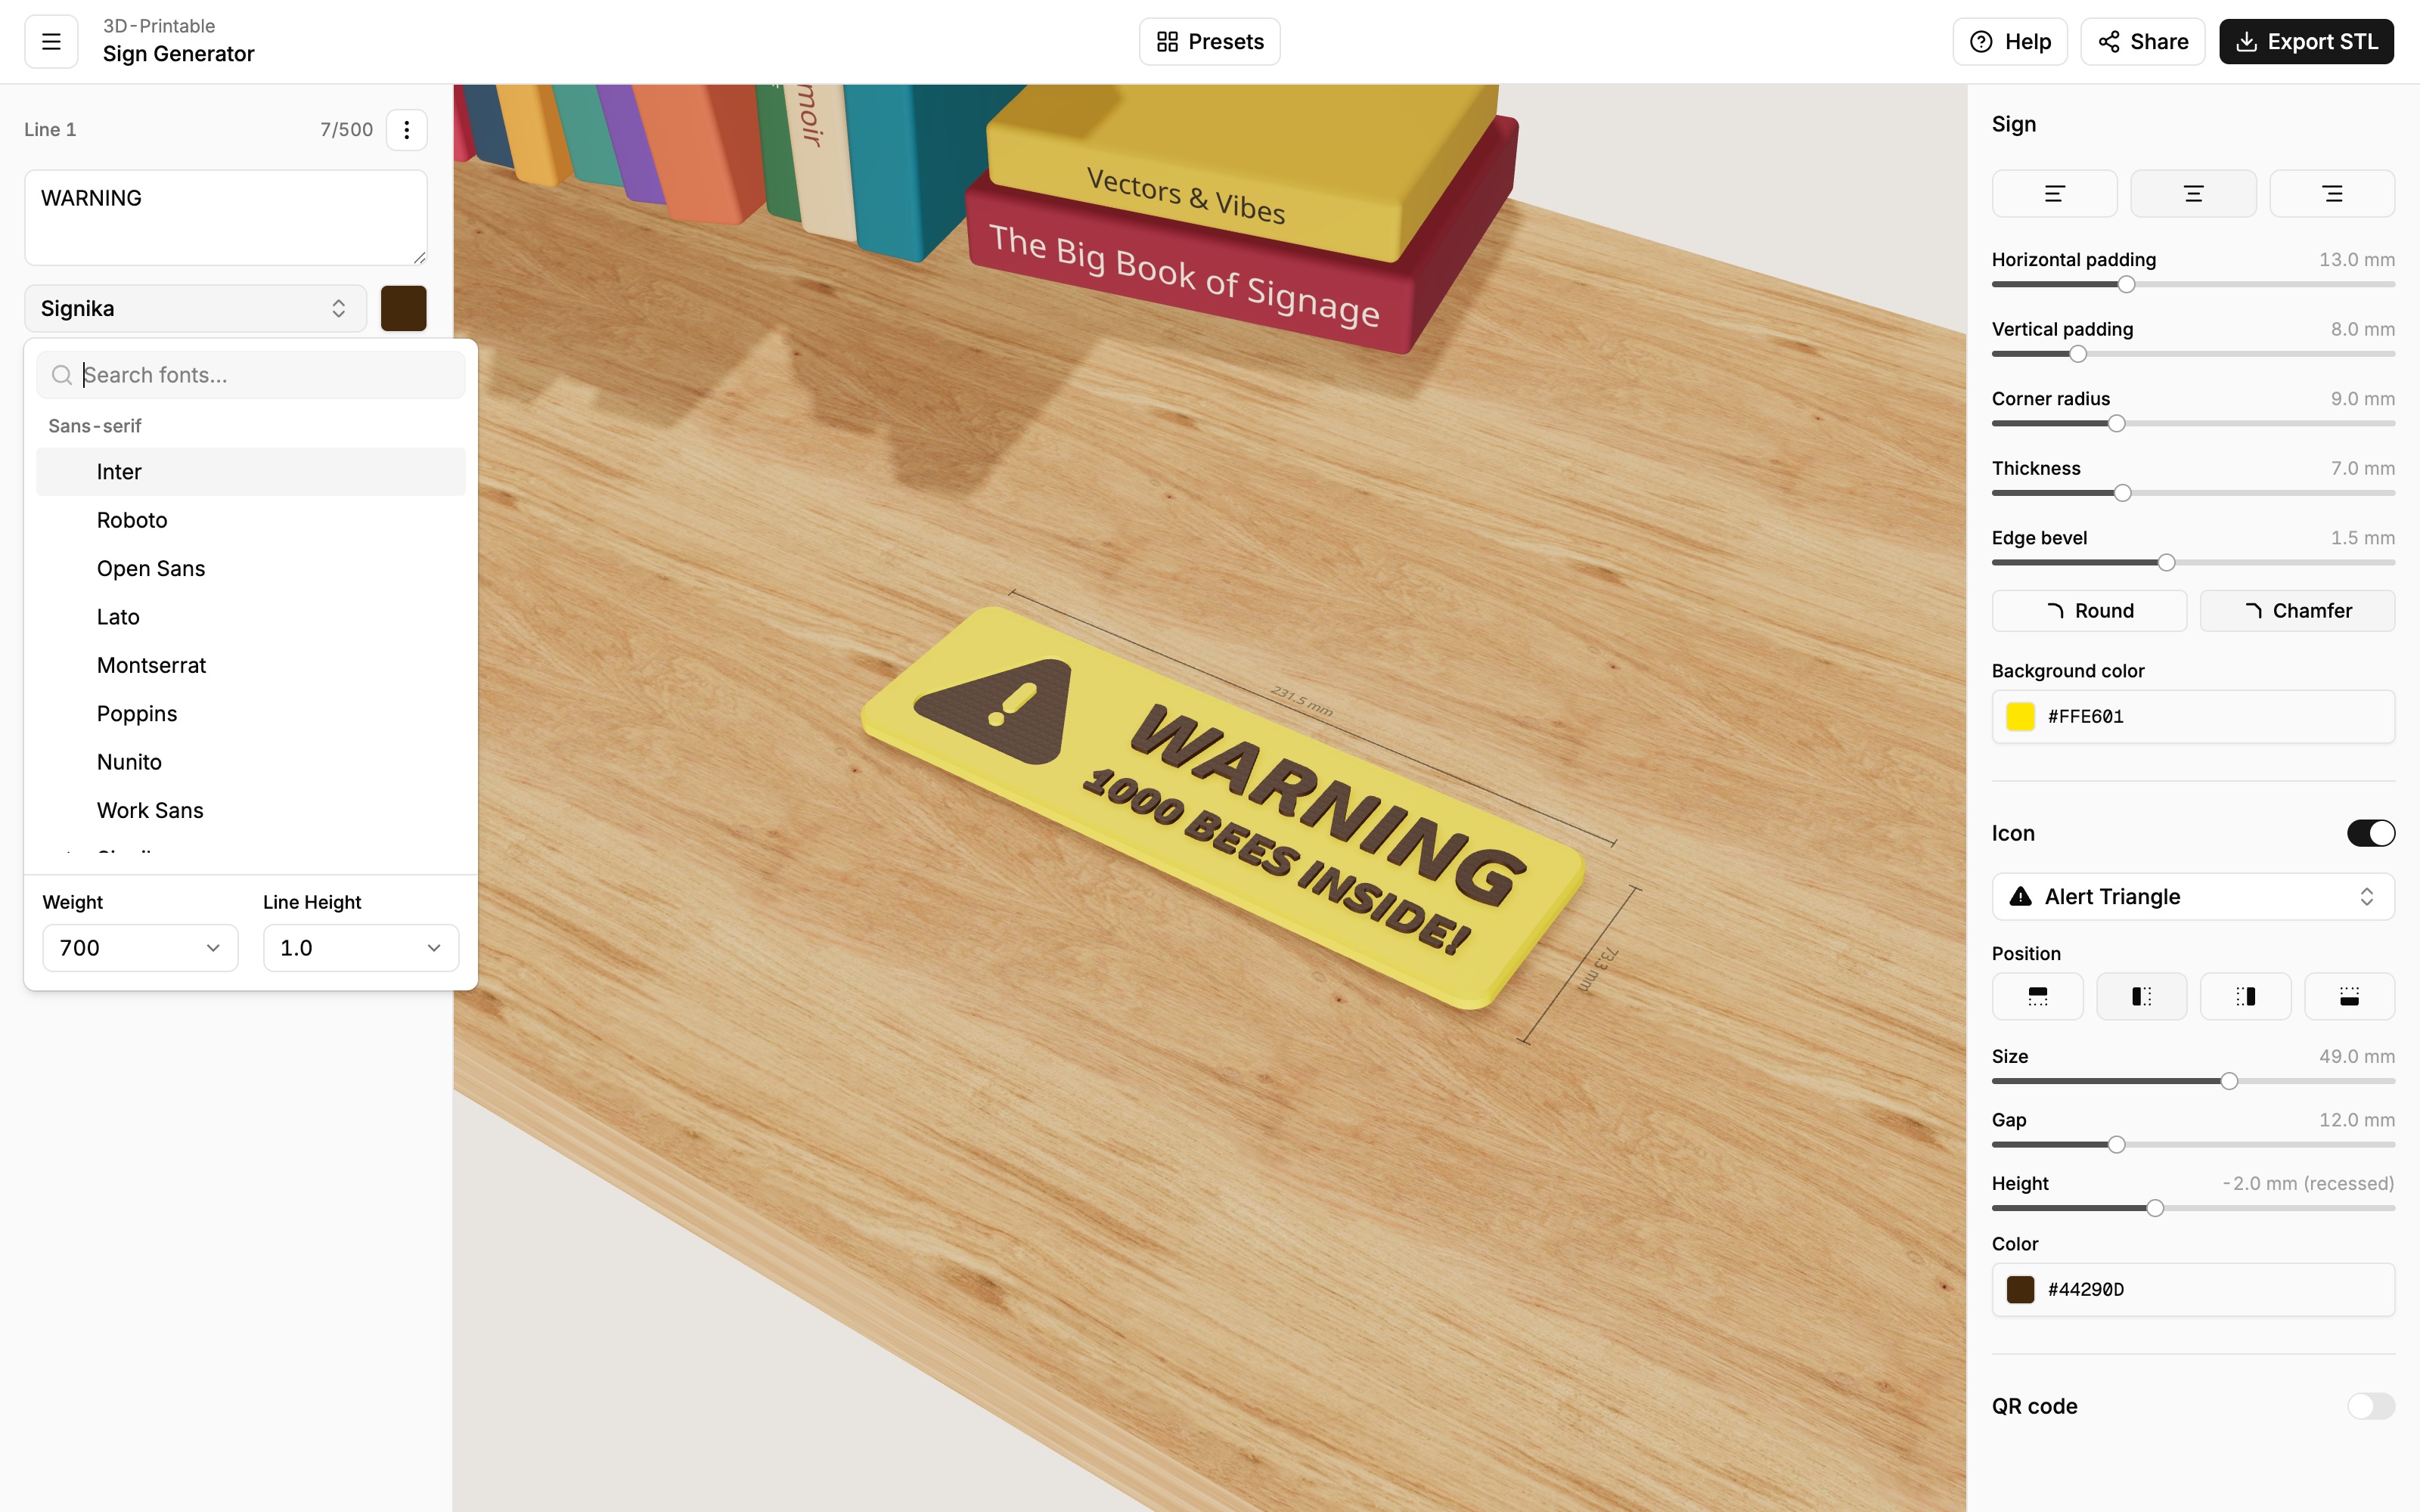
Fonts
Click the font name to open the font picker. You can search by name or browse by style — sans-serif, serif, display, monospace and handwriting. There are 85 fonts to choose from.
Below the font list you'll find:
- Weight — how thick the letters are (regular, bold, …). Bolder weights generally print better at small sizes.
- Line Height — the vertical spacing between rows of text.
- An italic toggle, for fonts that have an italic style.
Size, color and height
Each line has three more controls:
- Size — the height of the letters in millimeters (or inches). This is the letters' real printed size, so a 30 mm line will be 30 mm tall on the finished sign.
- Color — the line's color. Each color becomes its own file when you export, so anything you can select here you can print.
- Height — whether the text sticks out of the sign, sits flush, or is carved into it. This is one of the most fun settings — see Raised & recessed elements.
Tiny text and thin fonts
3D printers draw with a nozzle that's usually 0.4 mm wide, so very small or very thin letters can lose detail. If your text looks fragile, increase the size or switch to a bolder weight.
Text wrapping
By default a line is One Line: the text stays on a single row, and the sign simply grows wider as you type.
For longer text — descriptions, plaques, instructions — open the line's ⋮ menu and choose Line Break. The line now behaves like a small paragraph:
- The text automatically wraps onto new rows when it reaches the Max width you set with the slider that appears.
- Pressing Enter in the text box starts a new row exactly where you want one.
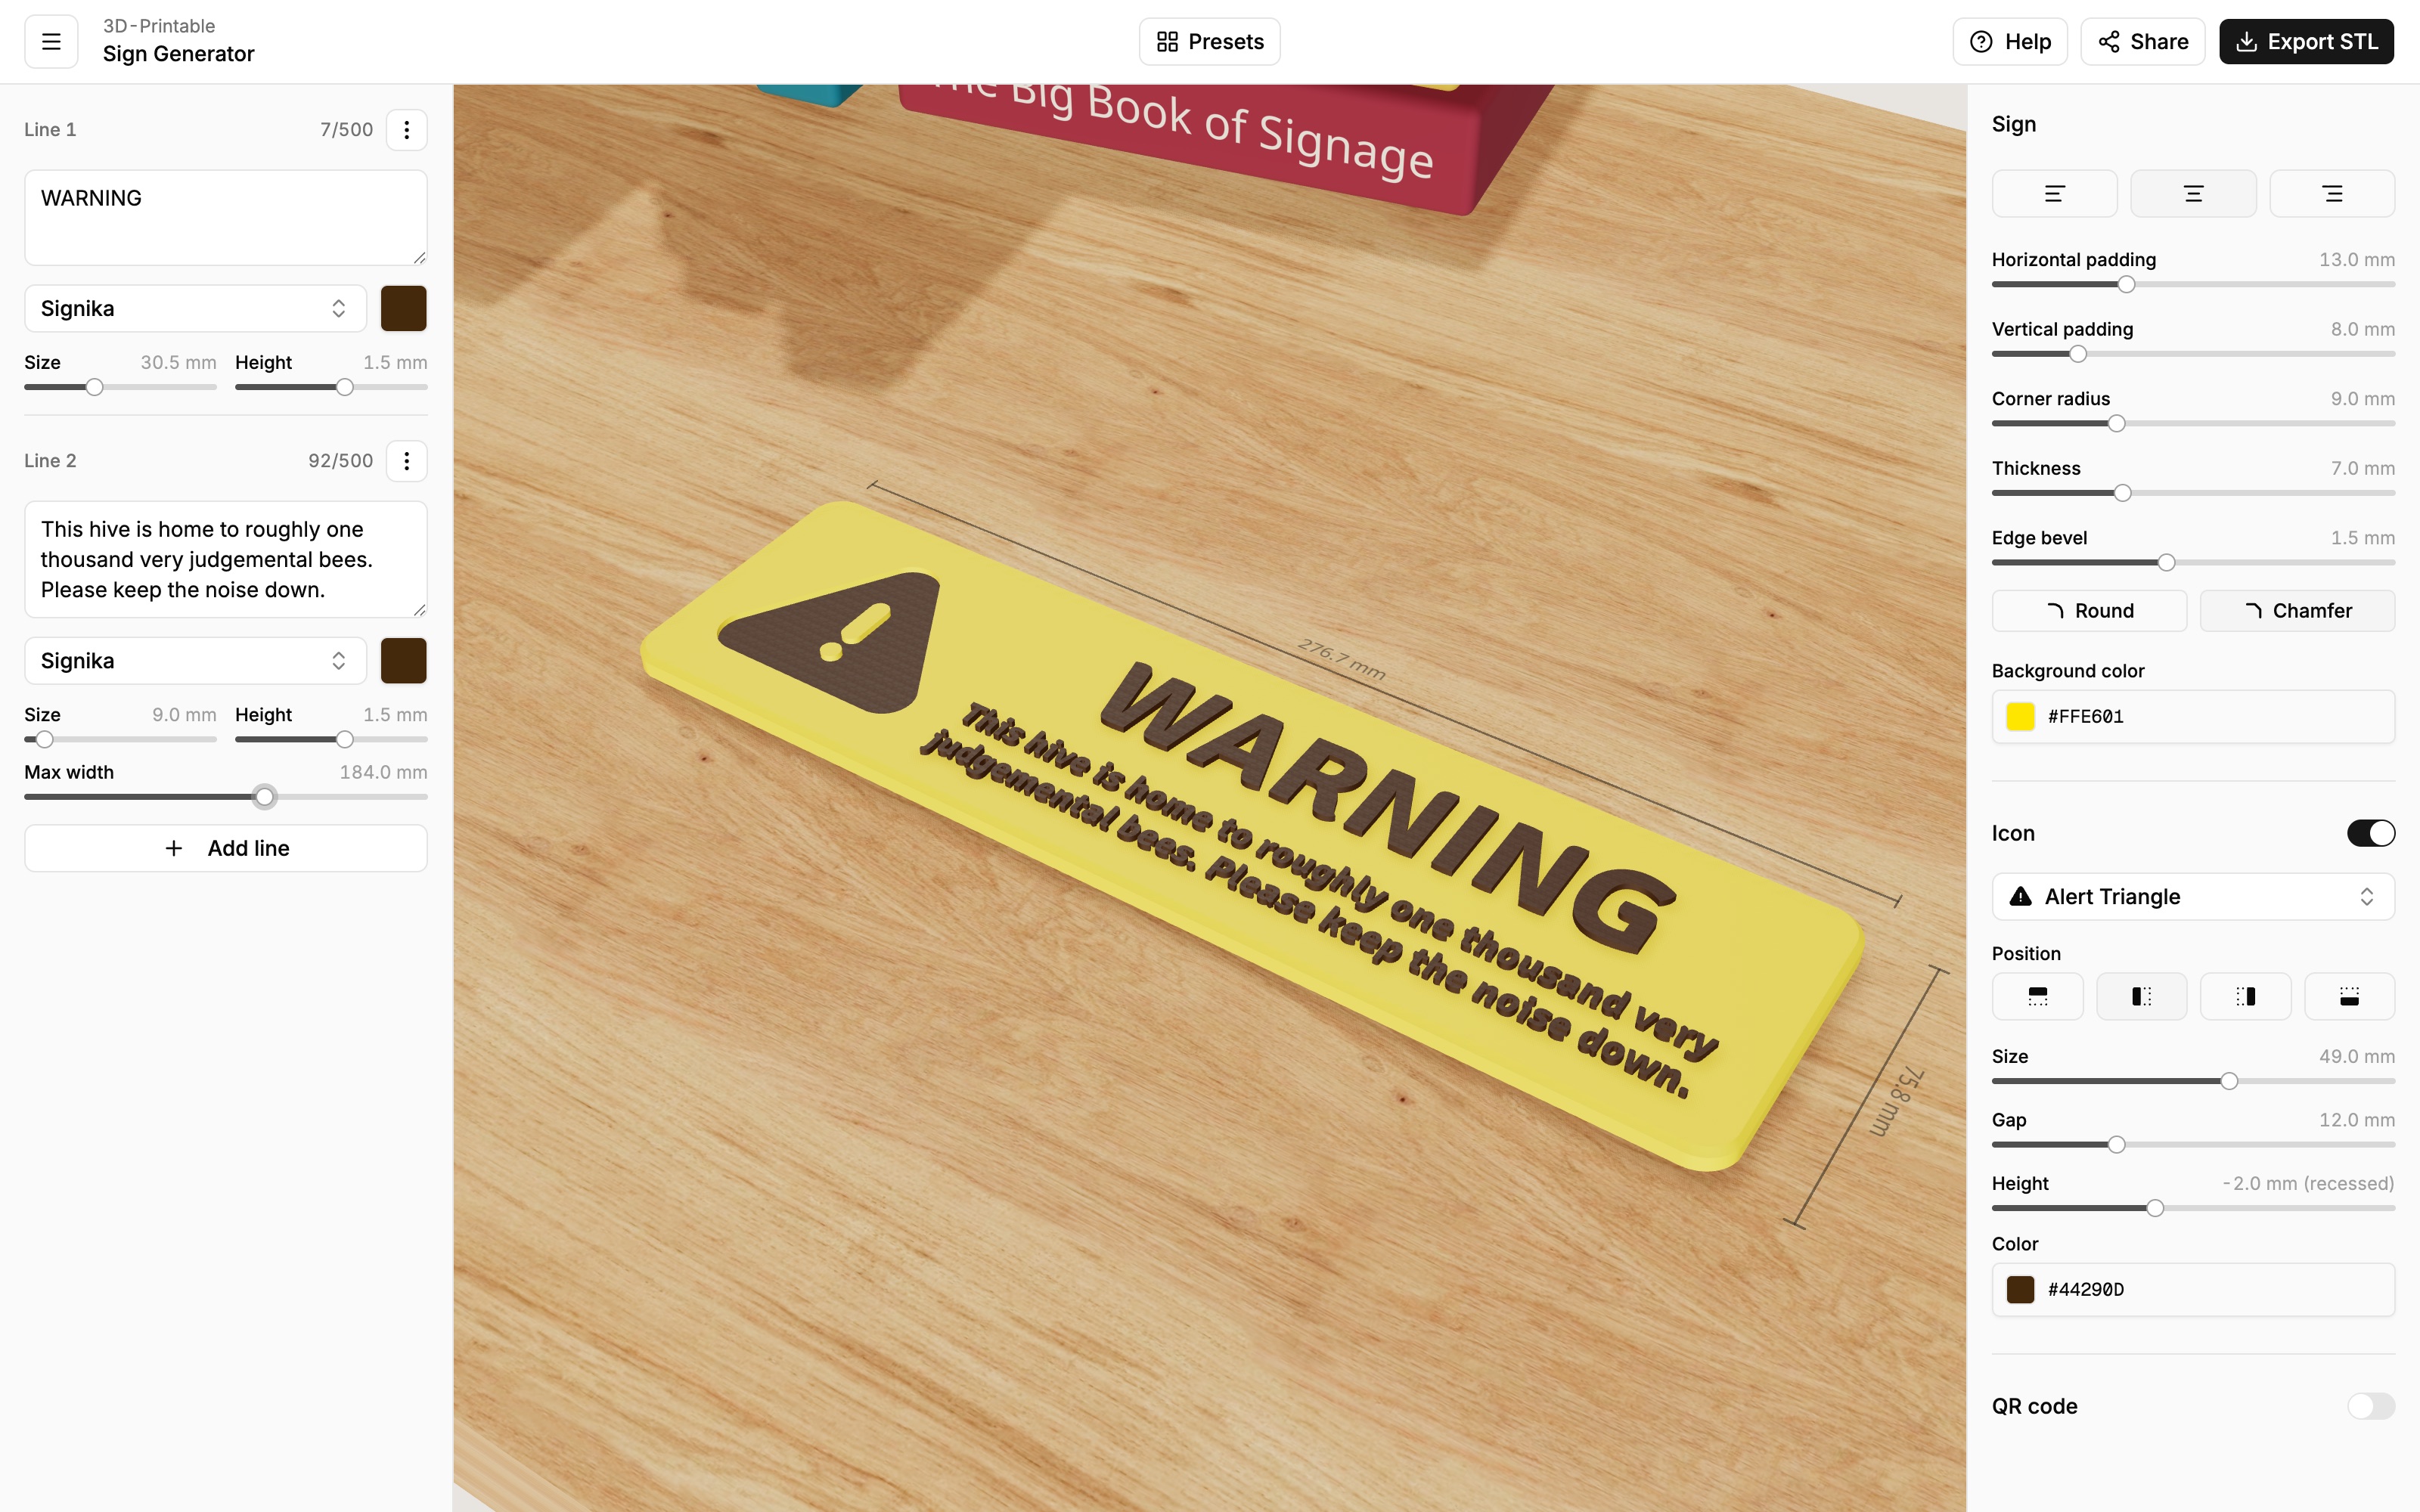
The sign still sizes itself automatically — the Max width only controls where the text wraps, and the sign wraps snugly around the result.